Master Small DIY Raised Garden Beds
Imagine transforming your compact backyard into a lush, thriving garden. What if I told you that DIY raised garden beds for small backyards could be your secret weapon? Visualize the crisp green vegetables, the vivid blooms of flowers, and the joy of harvesting your own produce. Ready to embark on this green adventure? Let's dive into the steps to create the easiest garden bed for your small space gardening needs.
Why Choose DIY Raised Garden Beds?
Raised garden beds offer a plethora of advantages. They improve drainage, prevent soil compaction, and allow for better control over soil quality. Plus, they're perfect for small backyards where space is at a premium. Whether you're a novice gardener or a seasoned pro, constructing your own raised bed garden can be a rewarding experience that yields both aesthetic and culinary delights.
Planning Your Raised Garden Bed
Before diving into garden bed construction, you need a solid plan. Start by identifying the perfect spot in your backyard. Consider sunlight exposure—most vegetables need at least 6 hours of daily sunlight—but also think about convenience. Where will you place your raised garden bed?
Next, decide on the size and shape. For small backyards, narrower and deeper beds work best. Think of it like a cozy nook where your plants can thrive without competing for space. A common size is 4 feet by 8 feet, but you can adjust based on your available area.
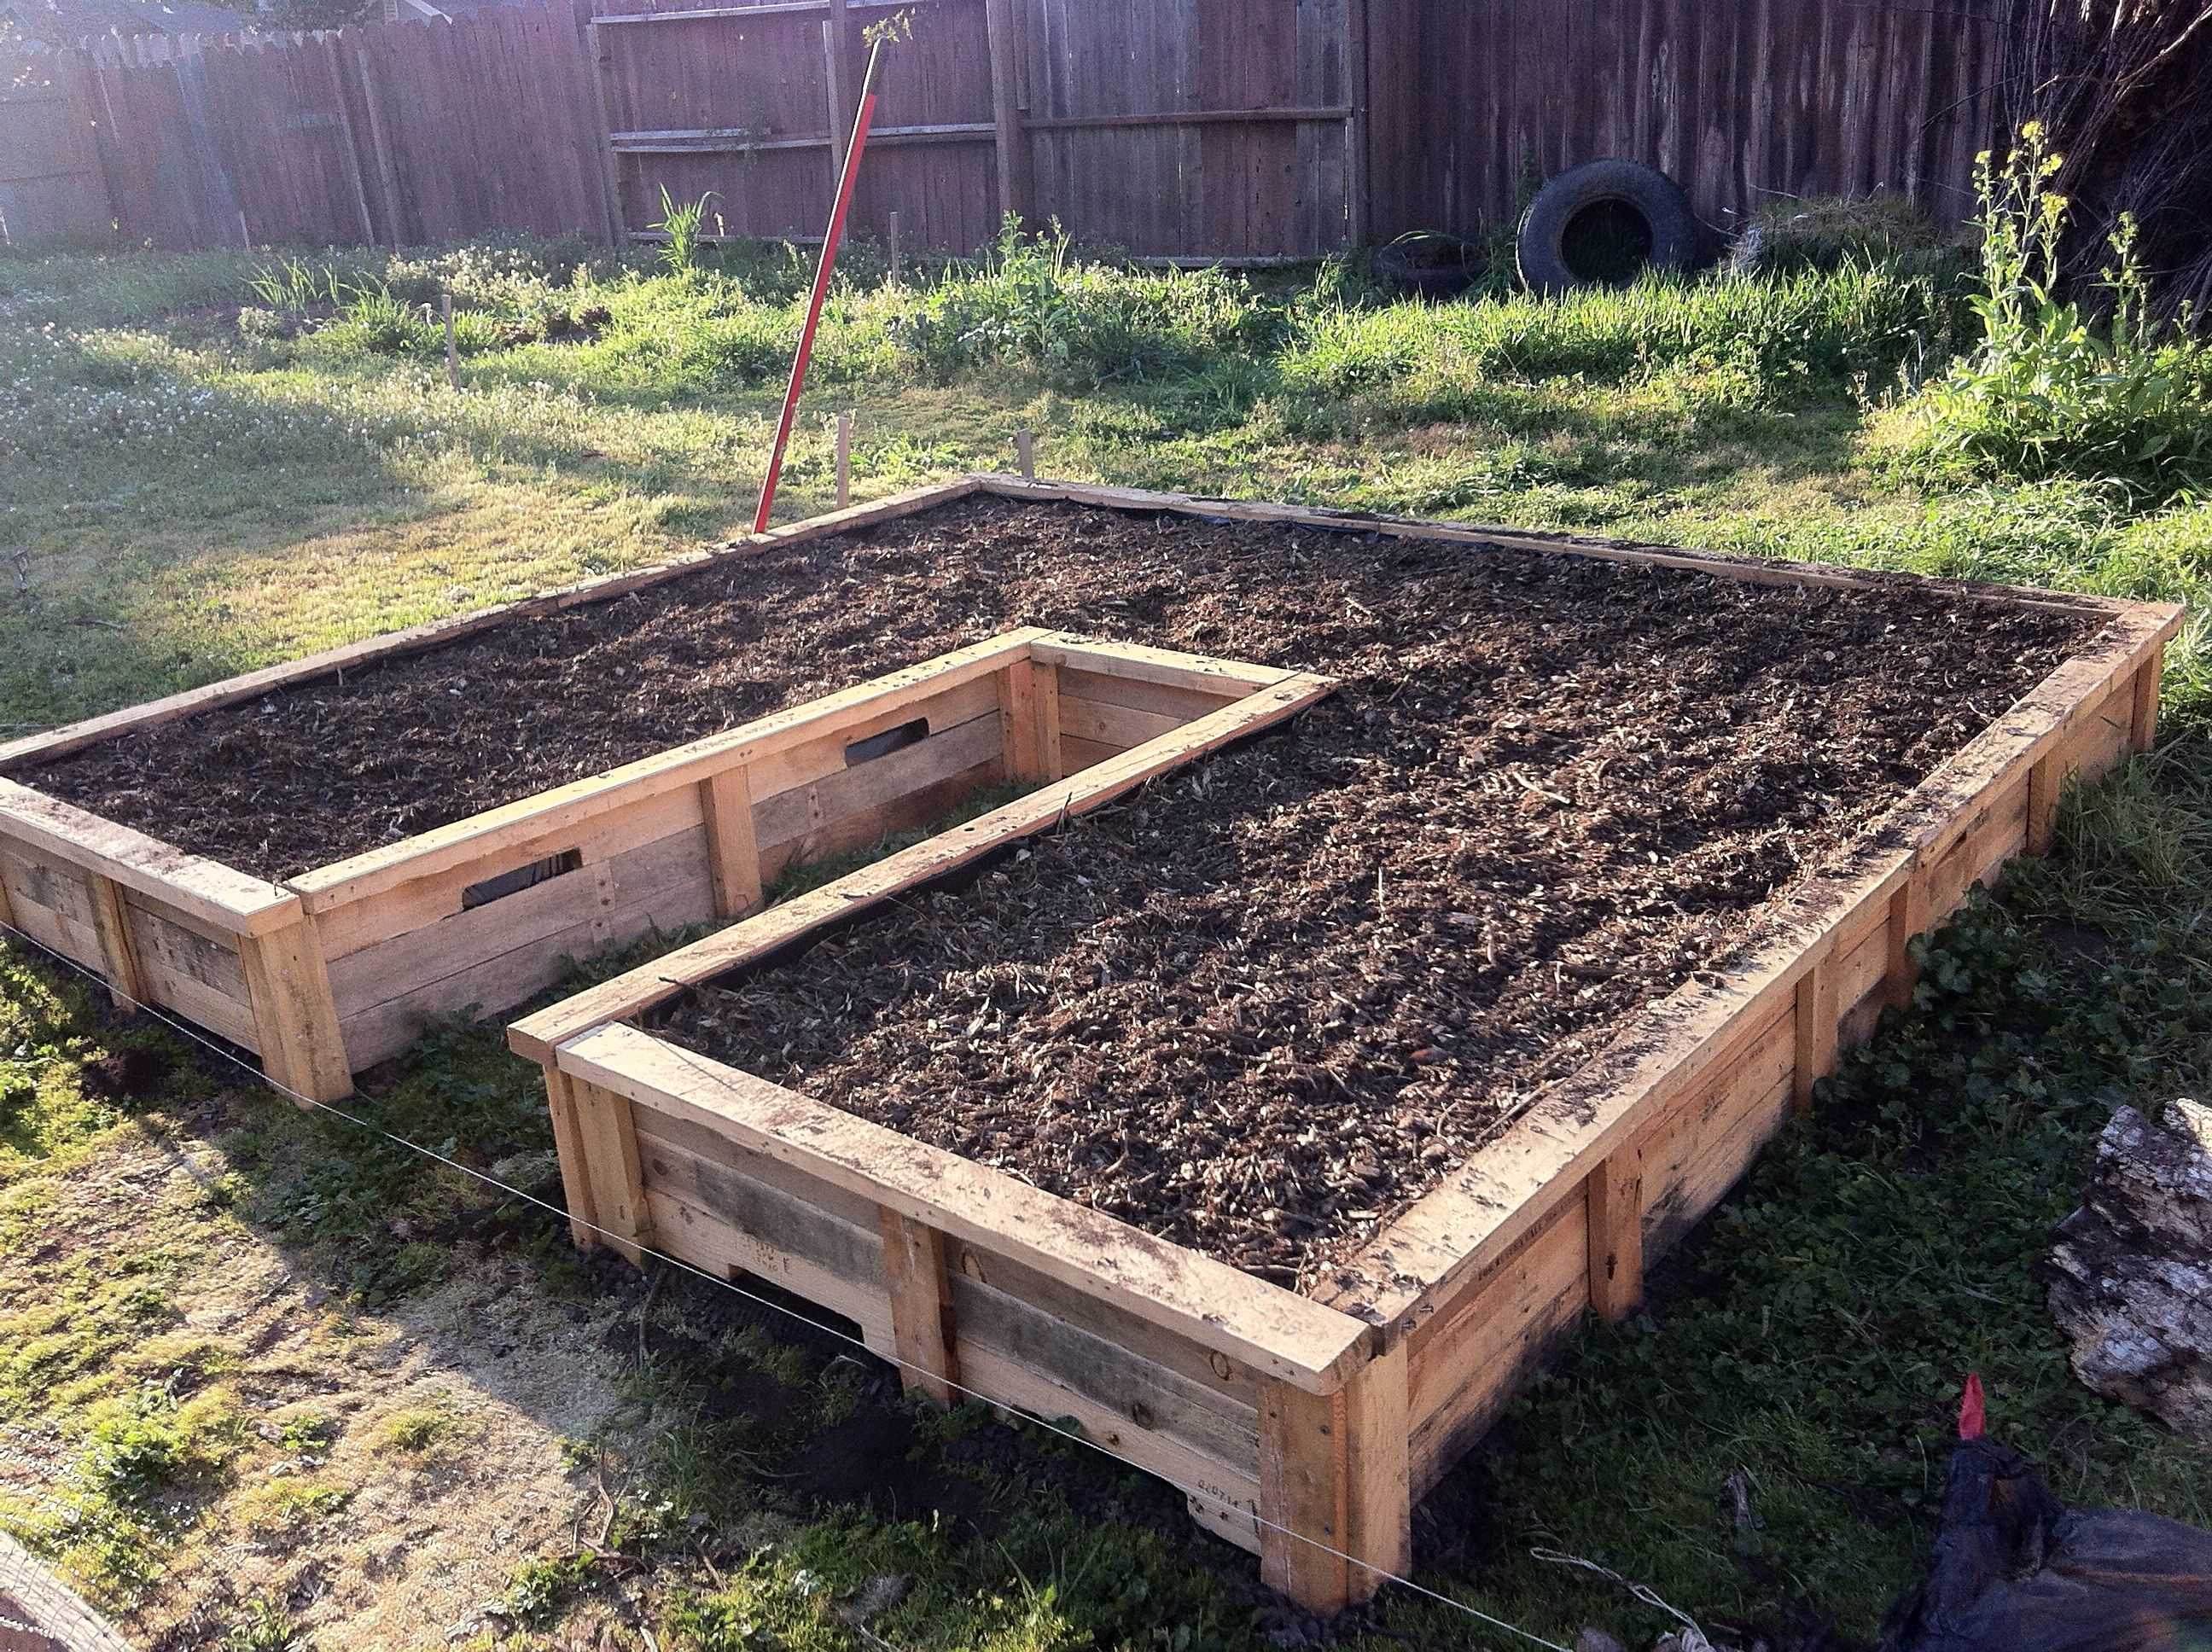
Choosing the Right Materials
The materials you choose for your garden bed construction will affect its longevity and aesthetics. Wood is a popular choice because it's easy to work with and blends well with the natural environment. Untreated cedar or composite lumber are excellent options due to their resistance to rot and pests.
However, if you're looking for a more modern look, consider metal or composite materials. Just ensure they're safe for edible gardening. Regardless of your choice, make sure your materials are sturdy and can withstand the elements.
Step-by-Step Garden Bed Construction
Ready to roll up your sleeves? Let's get into the nitty-gritty of building your DIY raised garden beds for small backyards.
Measure and Cut Your Materials
Using your pre-planned measurements, mark and cut your chosen materials. Wood can be cut with a handsaw or circular saw, while composite and metal usually require specialized tools. Safety first—always wear protective gear like gloves and safety glasses.
Double-check your measurements before making any cuts. Remember the old carpentry saying, “Measure twice, cut once.” You don’t want to end up with mismatched boards or, worse, a bed that’s too short or too long.
Assemble the Frame
Lay out your cut materials on a flat surface. Assemble the frame using screws or nails. If you're using screws, pre-drilling pilot holes will prevent the material from splitting. For a stronger bond, consider using a construction adhesive along with your fasteners. Think of it like using glue on a puzzle—it ensures everything stays together.
Once your frame is complete, place it in your chosen location. Ensure it’s level by using a carpenters level. If needed, add blocks under the frame to make it even. This step is crucial because water should drain evenly rather than pooling in one area.
Fill with Soil
Your garden bed’s success relies heavily on the soil you use. For the best planting setup, fill your bed with a mix of topsoil, compost, and potting soil. Aim for a ratio that keeps the soil light and fertile. This blend will provide the necessary nutrients for your plants to flourish.
Layer the soil mixture into the bed, tamping it down gently to remove air pockets. Leave a few inches from the top to allow for watering and mulching. Think of this layering process like building a sandwich—the more layers, the better the flavor, or in this case, the healthier the plants.
Maintaining Your Raised Garden Bed
Congratulations, you’ve completed your raised garden bed! But the work doesn’t stop here. Regular maintenance is key to ensuring your garden thrives for years to come.
Watering and Weeding
Raised beds typically require more frequent watering than in-ground gardens. Checking the soil moisture is essential—stick your finger in up to the second knuckle. If it feels dry, it’s time to water. Consistent watering will help your plants grow strong and healthy.
Weeding is another crucial task. Pull out weeds as soon as they appear to prevent them from competing with your plants for nutrients. Think of weeding as a form of garden yoga—it’s a bit of work, but it keeps your garden flexible and healthy.
Fertilizing
Regularly fertilizing your garden bed will provide the necessary nutrients for your plants. Use a balanced, slow-release fertilizer or compost to keep the soil fertile. Follow the instructions on the package for the best results.
Seasonal Care
Different seasons require different care. In the fall, clean out any dead or dying plants and add fresh compost. In the spring, prepare the soil for planting by tilling in fresh compost. In the summer, keep an eye out for pests and diseases. Winter is the time to cover your bed with mulch to protect the soil from freezing.
Affordable and Efficient Small Space Gardening
Growing a garden in a small backyard doesn’t have to be a challenge. DIY raised garden beds for small backyards are an affordable and efficient solution. They allow you to grow a variety of plants in a limited space, maximizing your yield without overwhelming your backyard.
Think of your raised bed as a small but mighty hero. It takes up minimal space but delivers maximum results. With a little planning and effort, you can transform your compact backyard into a green oasis.
Grab Your Tools and Get Started!
Now that you have all the information you need, it’s time to get started on your DIY raised garden beds for small backyards. Remember, the easiest garden bed is one that you can build and maintain with ease. So, grab your tools, gather your materials, and let the gardening journey begin!
Ready to green your thumb? Don’t wait—click the link below for detailed garden bed construction guides, planting setup tips, and small space gardening hacks to make your DIY raised garden beds a success. Happy gardening!
If you’re eager to get started on creating your own DIY small backyard garden beds, take the next step and click here to find all the necessary tools, materials, and tips to make your gardening dreams a reality.
Frequently Asked Questions
1. What is the ideal size for a small backyard raised garden bed?
The ideal size depends on your available space and what you plan to grow. However, a common size for small spaces is 4 feet by 8 feet. This size is manageable and allows for a variety of plants.
2. Can I use pressure-treated wood for my raised garden bed?
It's generally recommended to avoid pressure-treated wood for raised garden beds that will contain edible plants. Pressure-treated wood can contain chemicals that may leach into the soil. Opt for untreated cedar, composite lumber, or metal for a safer option.
3. How deep should my raised garden bed be?
A minimum depth of 12 inches is recommended for most vegetables. However, deeper beds (18-24 inches) allow for better root development and easier soil management. Choose a depth based on your space and what you plan to grow.
4. Can I build a raised garden bed directly on grass?
Building directly on grass is not recommended. It can cause the grass to decompose and create an uneven surface. Instead, clear the area and place a layer of landscape fabric to prevent weeds from growing through.
5. How often should I water my raised garden bed?
The frequency of watering depends on the weather and the type of plants you’re growing. Generally, raised beds need more frequent watering than in-ground gardens. Check the soil moisture daily and adjust your watering schedule accordingly. ```

0 Response to " Master Small DIY Raised Garden Beds"
Post a Comment