DIY Cold Frames for Winter Gardening: Extend Your Growing Season with Ease

Are you a gardener who dreads the end of the growing season? Do you wish you could keep your green thumb active even as the temperatures drop? Enter DIY cold frames for winter gardening. These simple, cost-effective structures can extend your growing season, providing frost protection and a nurturing environment for your plants. Let's dive into the world of cold frames and discover how you can build and utilize your own to keep your garden thriving throughout the winter.
Understanding Cold Frames: Your Secret Weapon for Winter Gardening
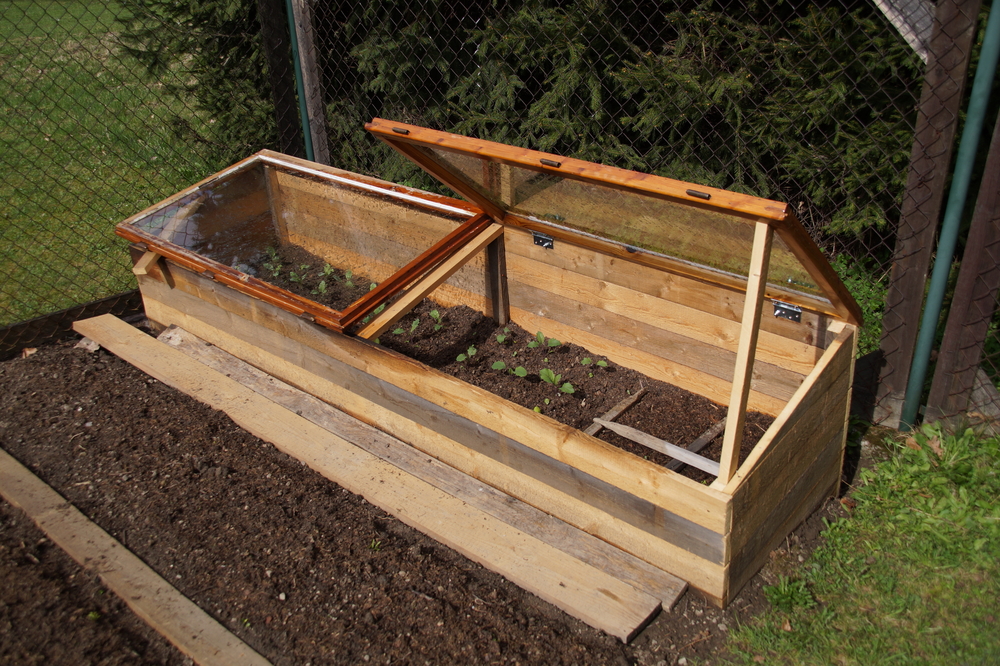
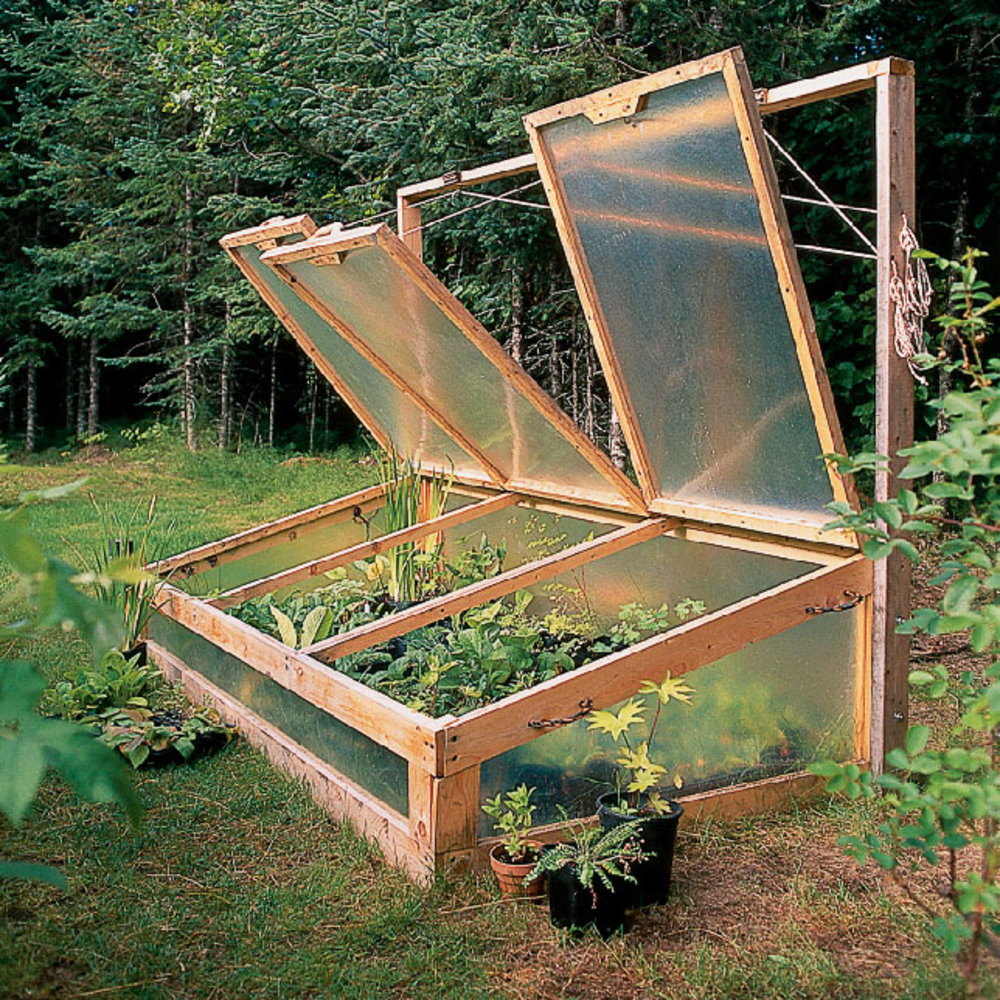
Cold frames are essentially miniature greenhouses, designed to capture solar heat and insulate plants from the cold. They are typically bottomless, four-sided structures with a transparent, sloping lid that allows sunlight in and keeps cold air out. By providing a controlled environment, cold frames enable you to start seeds earlier in the spring, protect tender seedlings, and grow cold-hardy vegetables throughout the winter.
Why DIY Cold Frames?
Building your own cold frame offers numerous benefits:
- Cost-effective: Store-bought cold frames can be pricey. With a DIY approach, you can save money by repurposing old materials or purchasing inexpensive components.
- Customizable: When you build your own, you can tailor the size, shape, and design to fit your specific needs and available space.
- Eco-friendly: By upcycling old windows, pallets, or other materials, you reduce waste and give new life to discarded items.
Getting Started: Cold Frame Plans and Designs
Before you start building, consider the following factors to determine the best cold frame design for your garden.
Location, Location, Location
Just like real estate, the location of your cold frame is crucial. Choose a spot that receives maximum sunlight, preferably with a southern exposure. Avoid areas prone to strong winds or excessive shade.
Size and Shape
The size and shape of your cold frame will depend on your available space and gardening goals. Popular designs include rectangular, lean-to, and A-frame structures. Ensure your cold frame is not too large, as this can make it difficult to maintain consistent temperatures and humidity levels.
Materials Matter
The materials you choose for your cold frame will impact its durability, insulation, and aesthetics. Common materials include:
- Wood: Untreated hardwoods like cedar or redwood are rot-resistant and provide good insulation. Avoid pressure-treated lumber, as it can leach chemicals into the soil.
- Bricks or Concrete Blocks: These materials offer excellent insulation and durability but can be more expensive and labor-intensive to install.
- Straw Bales: A budget-friendly and eco-conscious option, straw bales provide good insulation but are less durable than other materials.
For the lid, use transparent materials like glass, plastic sheeting, or rigid plastic panels to allow sunlight in. Hinged lids are ideal for easy access and ventilation.
Building Your DIY Cold Frame
Ready to get your hands dirty? Here's a simple step-by-step guide to building a basic wooden cold frame.
Materials
- Untreated hardwood boards (e.g., cedar or redwood)
- Transparent lid material (e.g., glass, plastic sheeting, or rigid plastic panels)
- Hinges and screws
- Saw, drill, and screwdriver
- Optional: weatherstripping, handle, and automatic vent opener
Steps
- Measure and cut: Determine the dimensions of your cold frame and cut the wooden boards accordingly. You'll need four side pieces and enough boards to create a sturdy frame for the lid.
- Assemble the sides: Attach the side pieces together using screws, ensuring the structure is square and level.
- Create the lid frame: Assemble the lid frame using the remaining wooden boards, ensuring it fits snugly on top of the side structure.
- Attach the lid: Secure the transparent lid material to the lid frame using screws or staples. Attach the lid to the side structure using hinges, ensuring it opens and closes smoothly.
- Optional enhancements: Add weatherstripping around the lid for better insulation, install a handle for easy opening, and consider an automatic vent opener to regulate temperature and humidity.

Using Your Cold Frame for Winter Vegetable Gardening
With your DIY cold frame complete, it's time to put it to use. Here are some tips for successful winter vegetable gardening:
Choose Cold-Hardy Vegetables
Some vegetables thrive in cooler temperatures and can tolerate light frosts. Popular choices for winter gardening include:
- Spinach
- Kale
- Lettuce
- Arugula
- Carrots
- Beets
- Radishes
Prepare Your Soil
Before planting, ensure your soil is well-draining and rich in organic matter. Add compost or well-rotted manure to improve soil fertility and structure.
Plant and Water
Plant your seeds or seedlings according to the package instructions, ensuring they have enough space to grow. Water your plants consistently, but avoid overwatering, as this can lead to mold and rot.
Monitor Temperature and Humidity
Keep an eye on the temperature and humidity levels inside your cold frame. On sunny days, temperatures can rise quickly, so ventilate as needed to prevent overheating. Conversely, provide additional insulation on extremely cold nights, such as covering the cold frame with a blanket or row cover.
Harvest and Enjoy
As your vegetables mature, harvest them regularly to encourage continued growth. Enjoy your homegrown produce throughout the winter, knowing you've extended your gardening season with your DIY cold frame.
Alternatives to Cold Frames: Garden Cloches and Row Covers
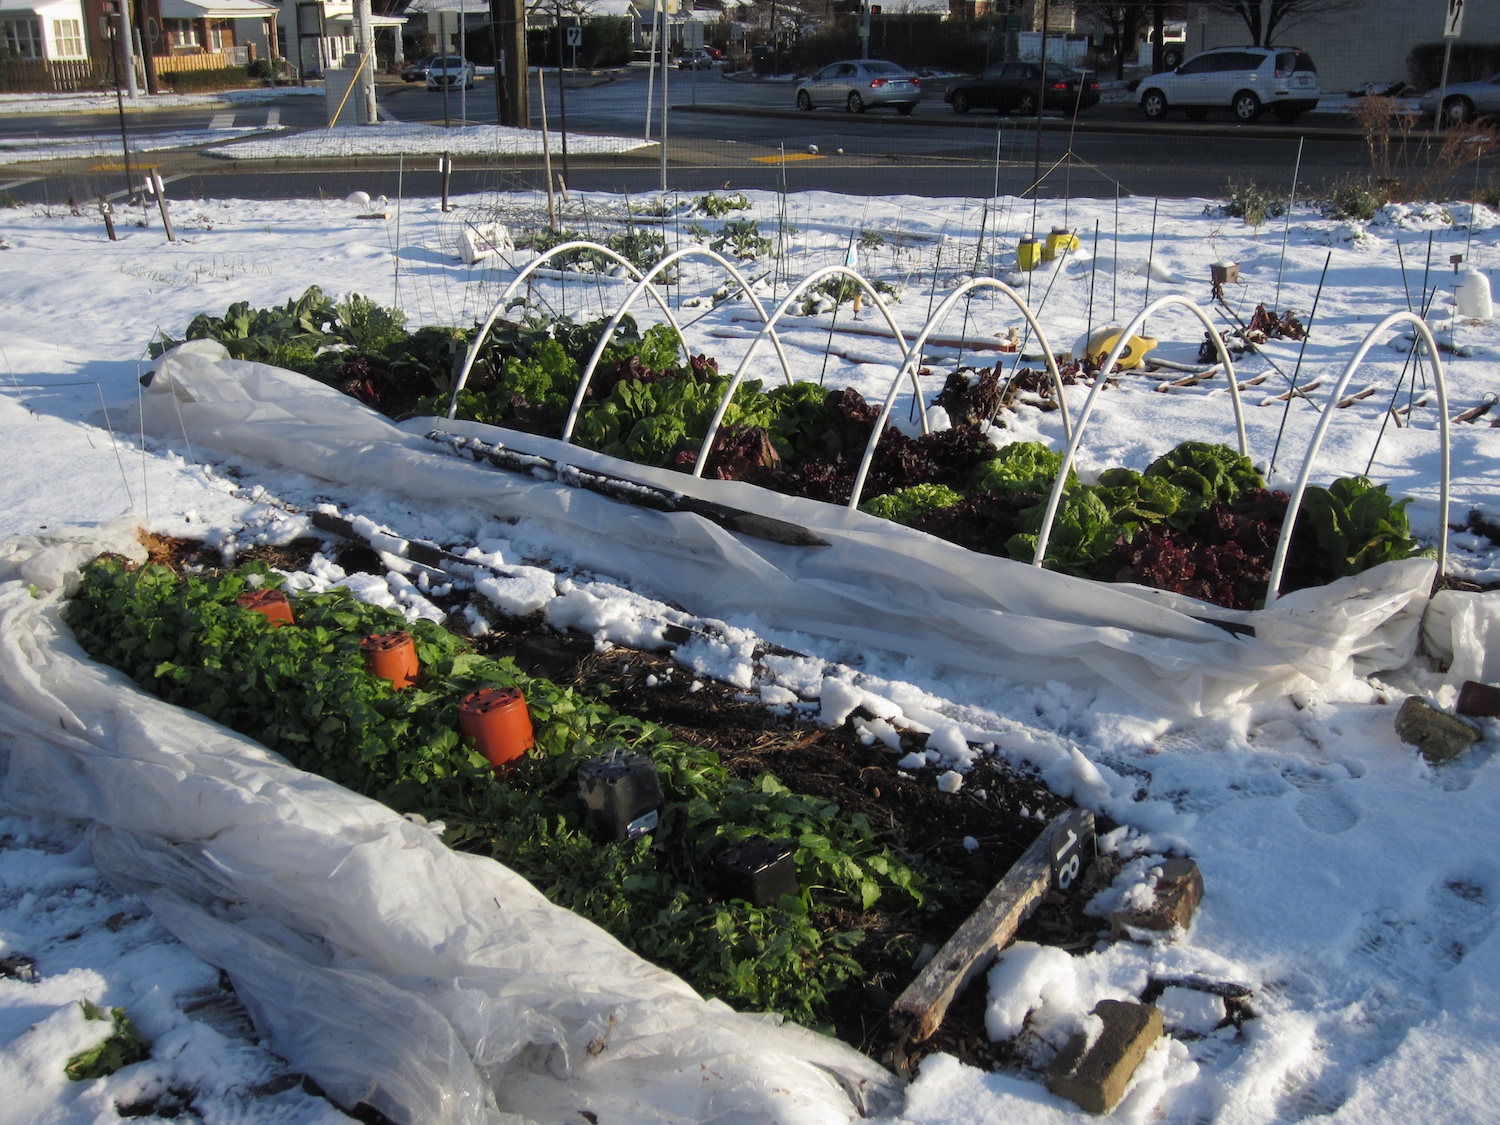
While cold frames are an excellent choice for winter gardening, they're not the only option. Garden cloches and row covers can also provide frost protection and season extension.
Garden Cloches
Garden cloches are individual plant protectors, typically made of glass, plastic, or fabric. They create a mini greenhouse effect around each plant, shielding them from the cold and pests. Cloches are ideal for protecting individual plants or small groups of plants and can be easily moved around the garden as needed.
Row Covers
Row covers are lightweight, breathable fabrics that can be draped over rows of plants to provide insulation and frost protection. They allow light, air, and water to pass through while trapping heat and keeping pests out. Row covers are an economical and versatile option for protecting larger areas of the garden.

Conclusion: Embrace the Cold with DIY Cold Frames
DIY cold frames for winter gardening offer an affordable and rewarding way to extend your growing season. By building and utilizing your own cold frame, you can enjoy fresh, homegrown produce year-round while honing your gardening skills. So, why let the cold weather dampen your green thumb? Embrace the challenge and reap the benefits of winter gardening with your DIY cold frame.
Happy gardening!
FAQs
What is the ideal temperature range for a cold frame? The ideal temperature range for a cold frame depends on the plants you're growing. Most cold-hardy vegetables prefer temperatures between 40°F and 70°F (4°C and 21°C). Monitor your cold frame's temperature and adjust ventilation as needed to maintain a suitable range.
Can I use a cold frame to start seeds in the spring? Yes, cold frames are excellent for starting seeds in the spring. They provide a controlled environment that protects young seedlings from frost and pests while acclimating them to outdoor conditions.
How do I prevent my cold frame from overheating? To prevent overheating, ventilate your cold frame on sunny days by propping open the lid. Consider installing an automatic vent opener, which will open and close the lid as needed to regulate temperature and humidity.
Can I use a cold frame to grow warm-season vegetables in the winter? While cold frames can extend the growing season, they may not provide enough warmth for heat-loving vegetables like tomatoes, peppers, and cucumbers in cold winter regions. In milder climates, however, you may have success growing warm-season vegetables in a cold frame during the winter.
How do I maintain my cold frame to ensure its longevity? To maintain your cold frame, inspect it regularly for signs of damage or wear. Replace any rotting wood, tighten loose screws, and repair or replace the lid material as needed. Additionally, clean the cold frame between growing seasons to remove debris and prevent pest and disease issues.
For further reading and inspiration, check out these authoritative resources on cold frames and winter gardening:
0 Response to "DIY Cold Frames for Winter Gardening: Extend Your Growing Season with Ease"
Post a Comment