How to Make a DIY Worm Composting Bin for Beginners

Are you looking to reduce your organic waste and create a nutrient-rich fertilizer for your garden? Vermicomposting, or worm farming, is an eco-friendly solution that turns your kitchen scraps into a homemade compost. Imagine transforming your food waste into a valuable resource, just like turning lemons into lemonade. In this guide, we'll walk you through the steps to create a DIY worm composting bin for beginners. Let's dive in!
What is Vermicomposting?
Vermicomposting is the process of using worms to break down organic waste into a nutrient-rich fertilizer. This eco-friendly method not only reduces waste but also provides a valuable resource for your garden. Think of it as a tiny, efficient recycling plant right in your backyard.
Benefits of Vermicomposting
- Reduces Organic Waste: Vermicomposting can reduce your household waste by up to 50%.
- Nutrient-Rich Fertilizer: The resulting compost is packed with nutrients that plants love.
- Eco-Friendly: It's a natural and sustainable way to manage waste.
- Easy and Fun: It's a great project for beginners and can be a fun educational activity for kids.
Materials Needed
Before we start, gather the following materials:
- Two plastic storage bins (one with a lid)
- Drill
- 1/4-inch drill bit
- Newspaper or cardboard
- Water
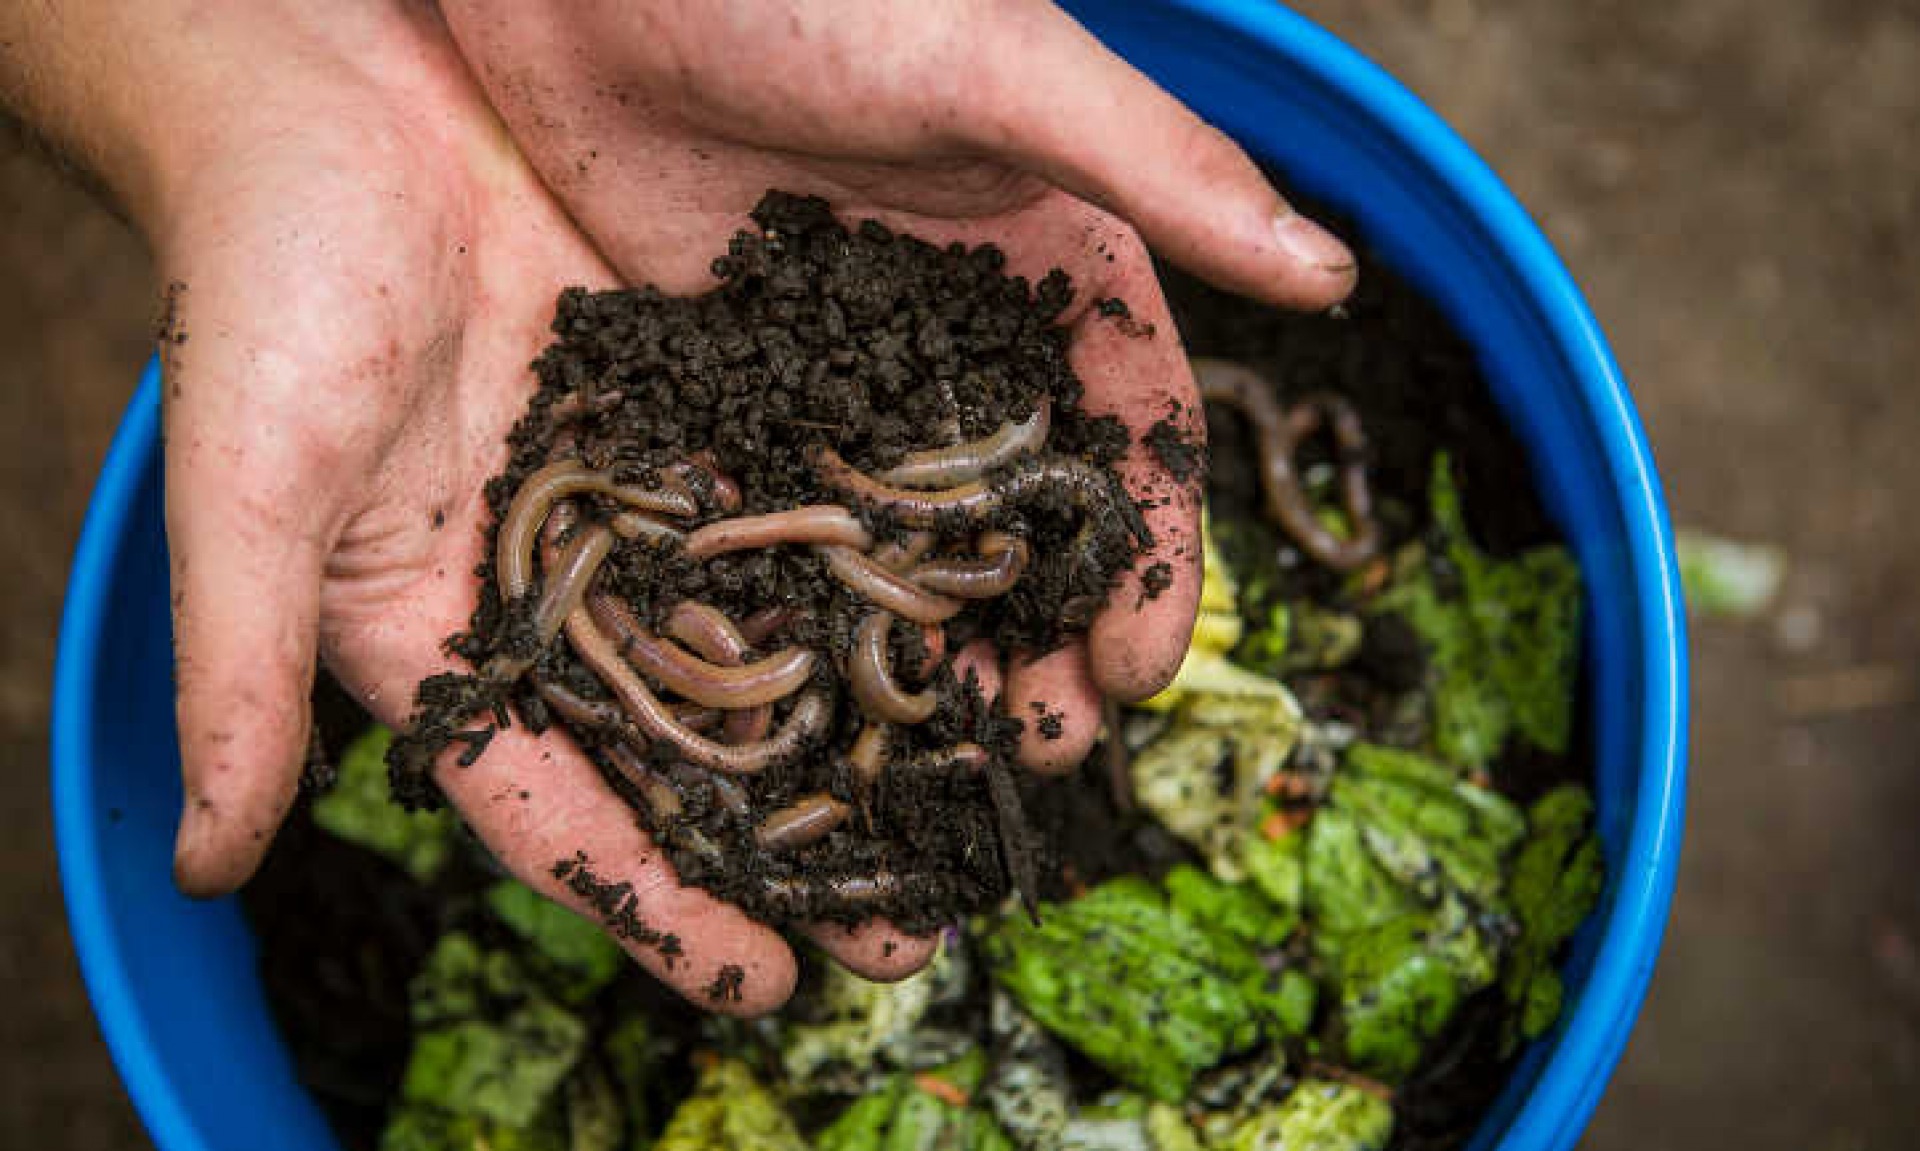
- Red wiggler worms (Eisenia fetida)
- Organic waste (fruit and vegetable scraps, coffee grounds, tea bags)
Step-by-Step Guide to Building Your DIY Worm Composting Bin
Step 1: Prepare the Bins
First, you'll need two plastic storage bins. One will be the main composting bin, and the other will be used to collect the liquid (leachate) that drains from the compost.
Step 2: Drill Holes
Using a 1/4-inch drill bit, drill several holes in the bottom of the main composting bin. These holes will allow excess liquid to drain out. Also, drill a few holes in the lid of the bin for ventilation.
Step 3: Set Up the Drainage System
Place the main composting bin inside the second bin. This setup will allow the leachate to collect in the bottom bin, making it easy to drain and use as a liquid fertilizer.
Step 4: Prepare the Bedding
Shred newspaper or cardboard into small pieces. Soak the shredded paper in water until it's damp but not dripping wet. This will serve as the bedding for your worms.
Step 5: Add the Worms
Introduce your red wiggler worms to their new home. Spread them evenly over the bedding. Red wigglers are the best choice for vermicomposting because they thrive in the conditions of a compost bin.
Step 6: Feed the Worms
Start adding your organic waste to the bin. Bury the food scraps under the bedding to keep the bin clean and reduce odors. Remember, worms can eat about half their weight in food per day, so don't overfeed them.
Step 7: Maintain the Bin
Keep the bin in a cool, shady spot. Check on it regularly to ensure the bedding stays moist and the worms are happy. Add more food scraps as needed, but avoid overfeeding.
Tips for Successful Vermicomposting
- Avoid Meat and Dairy: These can attract pests and create unpleasant odors.
- Maintain Moisture: The bedding should be damp but not soggy.
- Harvest the Compost: After a few months, you'll have a rich, dark compost ready to use in your garden.
Conclusion
Creating a DIY worm composting bin for beginners is a rewarding and eco-friendly project. By following these simple steps, you can turn your organic waste into a valuable resource for your garden. Not only will you reduce your waste, but you'll also have a nutrient-rich fertilizer that your plants will love. So, why not give vermicomposting a try? Your garden (and the planet) will thank you!
FAQs
What kind of worms should I use for vermicomposting?
- Red wiggler worms (Eisenia fetida) are the best choice for vermicomposting. They thrive in the conditions of a compost bin and are efficient at breaking down organic waste.
How often should I feed my worms?
- Worms can eat about half their weight in food per day. Start with a small amount of food and increase it gradually as the worm population grows.
What should I do if my bin starts to smell?
- A well-maintained worm bin should not have a strong odor. If your bin starts to smell, it may be too wet or you may be adding too much food. Try adding more dry bedding and reducing the amount of food.
How long does it take to get compost from a worm bin?
- It typically takes about 3-6 months to get usable compost from a worm bin. The time can vary depending on the size of the bin, the number of worms, and the amount of food added.
Can I use the liquid that drains from the bin?
- Yes, the liquid that drains from the bin, known as leachate, can be used as a liquid fertilizer for your plants. Dilute it with water before using it to avoid burning the plants.

By following this guide, you'll be well on your way to successful vermicomposting. Happy worm farming!

0 Response to "How to Make a DIY Worm Composting Bin for Beginners"
Post a Comment