How to Grow Orchids from Cuttings: A Comprehensive Guide

Orchids, with their exotic beauty and delicate charm, are often considered the epitome of elegance in the plant world. But did you know that you can propagate these stunning flowers from cuttings? Imagine creating a lush garden filled with orchids, all grown from your own hands. Intrigued? Let's dive into the captivating world of orchid propagation and discover how to grow orchids from cuttings.
Understanding Orchid Propagation
Orchid propagation is a fascinating process that allows you to create new plants from existing ones. While there are several methods of propagation, growing orchids from cuttings is one of the most rewarding. This method involves taking a cutting from a healthy orchid plant and encouraging it to root and grow into a new plant.
Why Grow Orchids from Cuttings?
Growing orchids from cuttings offers several advantages. It's a cost-effective way to expand your orchid collection, and it allows you to share the beauty of these plants with friends and family. Plus, there's a unique satisfaction in nurturing a new plant from a simple cutting.
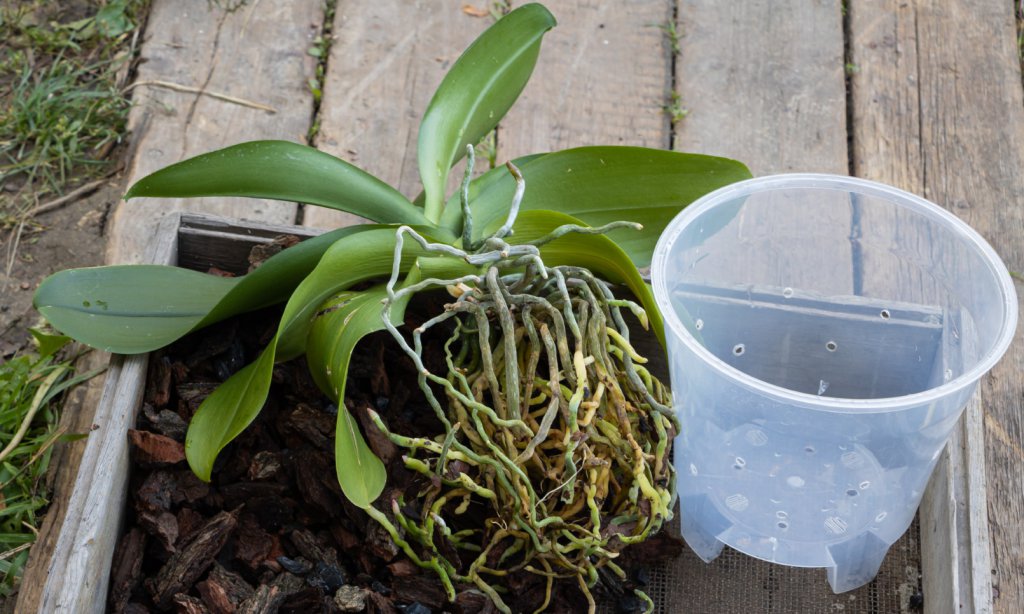
Preparing for Orchid Propagation
Before you start cutting orchids, it's essential to have the right tools and environment. Here's what you'll need:
- Sharp, sterile cutting tools: A pair of sharp scissors or a knife will do the trick. Make sure they're sterile to prevent the spread of diseases.
- Rooting hormone: This can help encourage root growth in your cuttings.
- Potting medium: Orchids prefer a well-draining mix, such as sphagnum moss or a specialized orchid mix.
- Containers: Small pots or trays with drainage holes are ideal.
- Humidity dome: This can be a plastic bag or a specialized dome to maintain high humidity levels.
Choosing the Right Orchid
Not all orchids are created equal when it comes to propagation. Some species are easier to grow from cuttings than others. Phalaenopsis orchids, for example, are a great choice for beginners due to their resilience and ease of care.
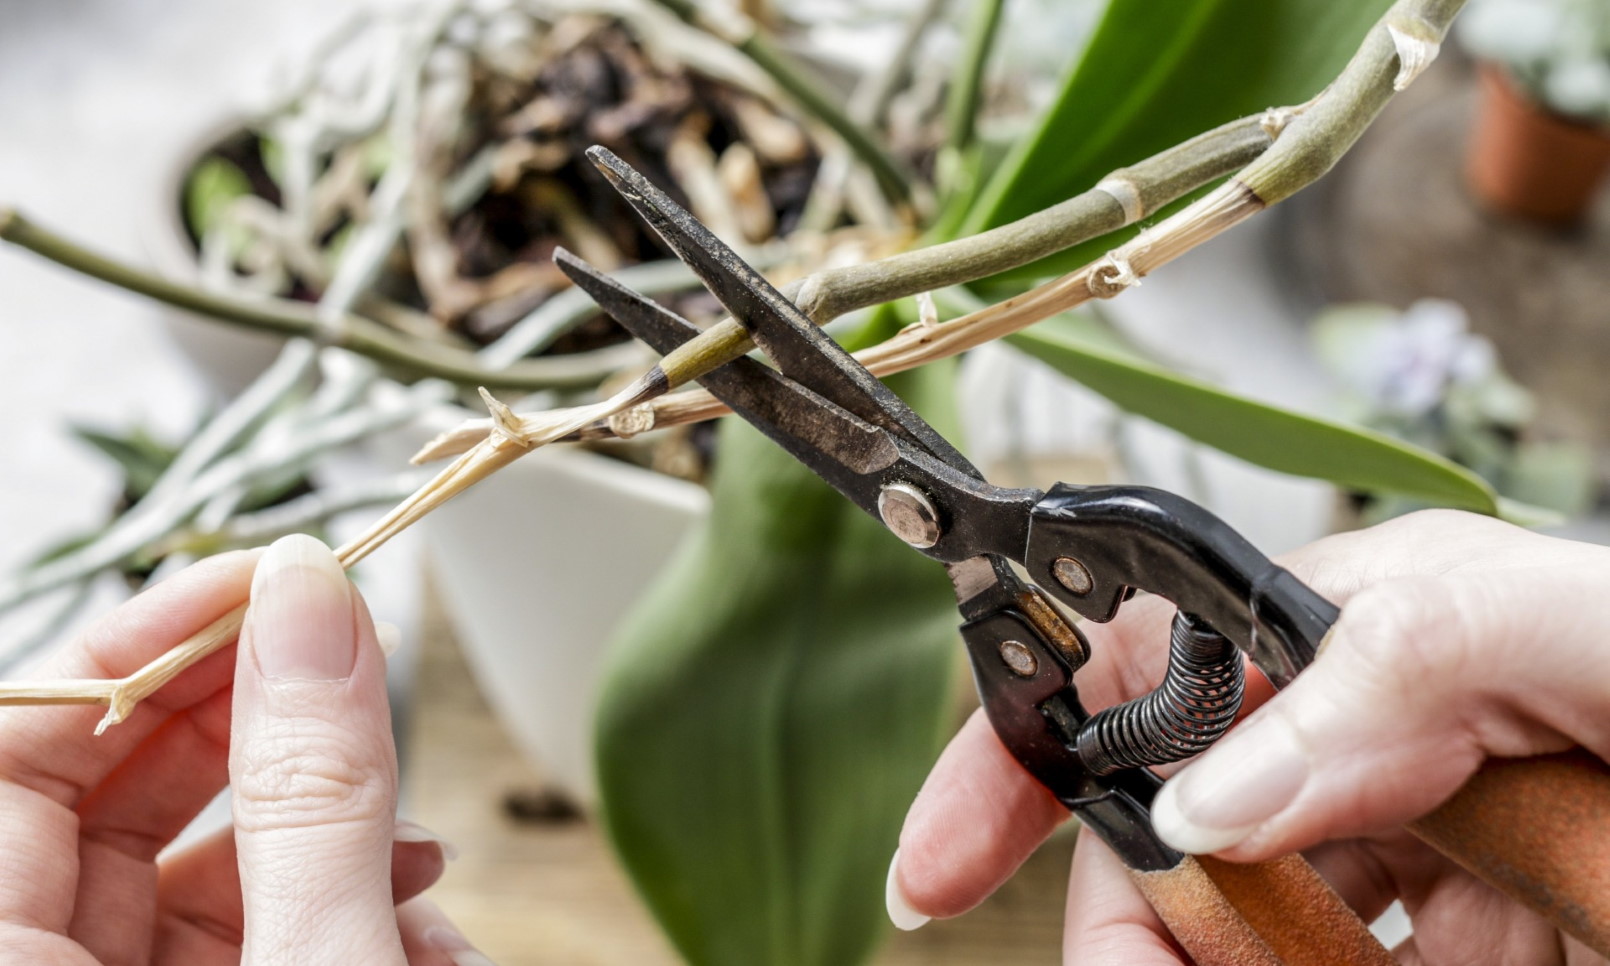
How to Take Orchid Cuttings
Taking cuttings from your orchid is a delicate process that requires patience and precision. Here's a step-by-step guide:
- Select a Healthy Plant: Choose an orchid that is healthy and free from pests and diseases.
- Identify the Right Stem: Look for a stem that has at least three nodes (the points where leaves emerge).
- Make the Cut: Using your sterile cutting tool, make a clean cut just below a node. The cutting should be about 3-4 inches long.
Rooting Orchids: The Next Steps
Once you have your cutting, it's time to encourage it to root. Follow these steps:
- Apply Rooting Hormone: Dip the cut end of the stem in rooting hormone to promote root growth.
- Plant the Cutting: Place the cutting in a small pot filled with your chosen potting medium. Make sure the cutting is firmly in place.
- Create a Humid Environment: Cover the pot with a humidity dome or a plastic bag to maintain high humidity levels. This is crucial for rooting orchids.
Caring for Your Orchid Cuttings
Orchid care during the rooting process is critical. Here are some tips to help your cuttings thrive:
- Light: Place your cuttings in a location with bright, indirect light. Avoid direct sunlight, which can scorch the delicate leaves.
- Temperature: Maintain a consistent temperature between 65-75°F (18-24°C).
- Watering: Keep the potting medium moist but not waterlogged. Overwatering can lead to root rot.
- Humidity: Ensure high humidity levels by misting the cuttings regularly or using a humidity dome.
Monitoring Growth
Patience is key when rooting orchids. It can take several weeks for roots to develop. Check your cuttings regularly for signs of new growth. Once roots have formed, you can gradually acclimate the new plant to normal growing conditions.
Transplanting Your New Orchid
Once your cutting has developed a strong root system, it's time to transplant it into a larger pot. Here's how:
- Choose the Right Pot: Select a pot that is slightly larger than the current one, with good drainage.
- Prepare the Potting Medium: Fill the new pot with a well-draining orchid mix.
- Transplant Carefully: Gently remove the cutting from its current pot and place it in the new one. Fill in any gaps with more potting medium.
- Water Thoroughly: Give your new orchid a good drink of water to settle the potting medium.
Conclusion
Growing orchids from cuttings is a rewarding experience that allows you to create new life from existing plants. With the right tools, environment, and care, you can successfully propagate orchids and expand your collection. Remember, patience and attention to detail are key. As you nurture your cuttings, you'll witness the magic of nature unfold before your eyes.
So, are you ready to embark on this exciting journey? Grab your tools, choose your orchid, and let the adventure begin. Happy propagating!
FAQs
How long does it take for orchid cuttings to root?
- It can take several weeks to a few months for orchid cuttings to develop roots. Patience is essential during this process.
What is the best time of year to take orchid cuttings?
- The best time to take orchid cuttings is during the spring or early summer when the plant is actively growing.
Can I propagate any type of orchid from cuttings?
- While many orchid species can be propagated from cuttings, some are easier than others. Phalaenopsis orchids are a popular choice for beginners.
What should I do if my orchid cutting starts to wilt?
- If your orchid cutting starts to wilt, it may be a sign of overwatering or insufficient light. Adjust your care routine accordingly.
How often should I water my orchid cuttings?
- Water your orchid cuttings when the top inch of the potting medium feels dry. Avoid overwatering, as this can lead to root rot.

0 Response to "How to Grow Orchids from Cuttings: A Comprehensive Guide"
Post a Comment