DIY Worm Composting Bin, Easy Steps
DIY Worm Composting Bin: Easy Steps for Sustainable Gardening
DIY Worm Composting Bin: A Fun and Eco-Friendly Project
Ever thought about turning your organic waste into nutrient-rich fertilizer? A DIY worm composting bin is just the thing for you! Also known as vermicomposting, this process uses worms to break down food scraps and other organic materials into a valuable soil amendment. Let's dive into the world of worm farming and create a homemade compost bin that's both easy and fun!
Why Vermicomposting?
Vermicomposting is an excellent way to reduce waste and promote sustainable gardening. Worms eat through organic waste, producing castings that are rich in nutrients and beneficial microbes. By creating a DIY worm composting bin, you're not only helping the environment but also improving the health of your plants.
Getting Started: Materials You'll Need
Before we dive into the steps, let's gather the necessary materials for your DIY worm composting bin:
- Two 10-gallon plastic storage bins (one with a lid)
- A drill with a 1/4-inch bit
- Newspaper or cardboard
- Water
- About a pound of red wiggler worms (Eisenia fetida)
- Organic waste (fruit and veggie scraps, coffee grounds, eggshells, etc.)
Steps to Create Your DIY Worm Composting Bin
1. Prepare the Bins
Grab those plastic storage bins and let's get started! One bin will be the home for your worms, while the other will collect the liquid fertilizer, also known as worm tea.
2. Drill Holes for Aeration and Drainage
Using the 1/4-inch drill bit, create holes in the bottom and sides of the bin that will house the worms. The holes in the bottom allow for drainage, while the holes on the sides provide aeration. Make sure the holes are evenly spaced to ensure proper airflow.
3. Create a Bedding for Your Worms
Shred some newspaper or cardboard into small strips and soak them in water. Wring out the excess water, so the bedding is damp but not dripping wet. Place this mixture in the bin with holes, filling it about halfway. This will serve as the initial bedding for your worms.
4. Introduce the Worms
Now it's time to welcome your red wiggler worms to their new home! Gently place them on top of the bedding. Don't worry if they seem to disappear; worms naturally burrow into the bedding.
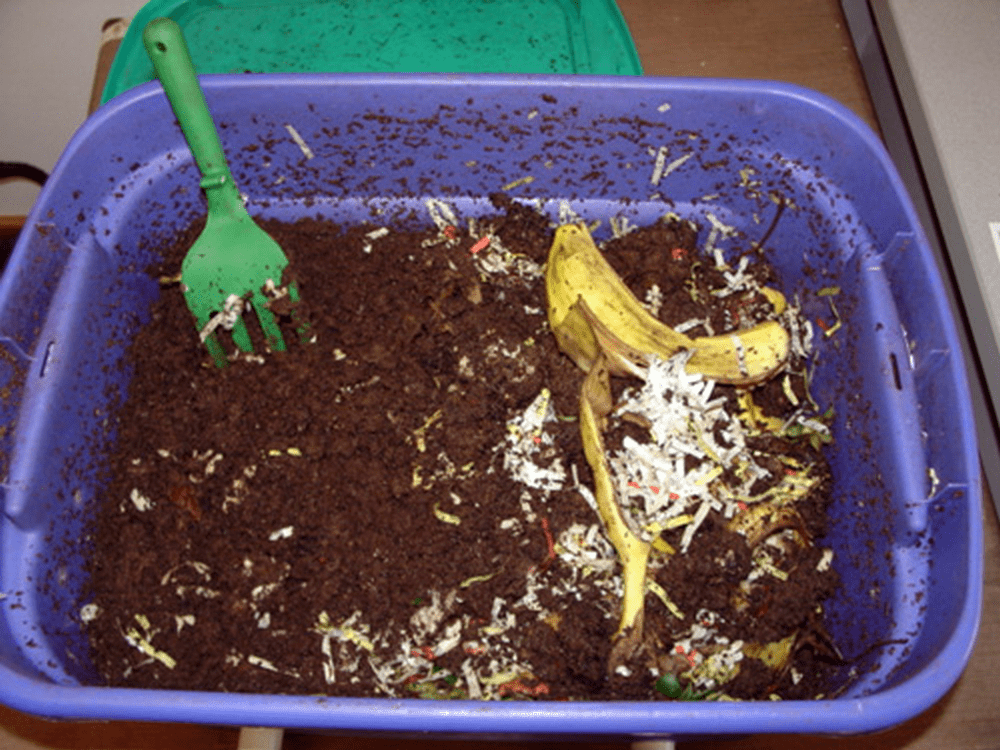
5. Add Organic Waste
Start adding your organic waste to the bin. Bury the scraps under the bedding to discourage fruit flies and other pests. Remember, worms can eat about half their body weight in food per day, so don't overfeed them.
6. Stack the Bins
Place the bin with worms inside the second bin (the one without holes). This will collect the worm tea, which is a fantastic liquid fertilizer for your plants.
7. Maintain Your DIY Worm Composting Bin
Keep your bin in a shady spot with temperatures between 40-80°F (4-27°C). Check on your worms every few days to ensure they have enough food and the bedding is moist.
What to Feed Your Worms
Worms have a varied diet, but not everything is suitable for your DIY worm composting bin. Stick to fruit and vegetable scraps, coffee grounds, tea bags, and crushed eggshells. Avoid meat, dairy, oily foods, and citrus, as these can harm your worms or attract pests.
Harvesting Your Vermicompost
After a few months, you'll notice that the bedding and food scraps have turned into a dark, earthy material. This is your vermicompost! To harvest, push the contents of the bin to one side and add fresh bedding to the other side. The worms will migrate to the new bedding, leaving behind the finished compost.
Using Your Vermicompost
Vermicompost is a potent soil amendment. Mix it into your potting soil or sprinkle it around your plants. You can also use the worm tea collected in the bottom bin to water your plants. Dilute it with water at a 1:1 ratio before using.
Troubleshooting Common Issues
Foul Odors
If your DIY worm composting bin starts to smell bad, it might be due to overfeeding or not enough aeration. Make sure the bin has enough drainage and airflow, and avoid adding too much food at once.
Fruit Flies
Fruit flies can be a nuisance but are usually a sign of exposed food scraps. Make sure to bury the scraps under the bedding to deter these pests.
Escaping Worms
If your worms are trying to escape, it could be a sign that the conditions in the bin are not ideal. Check the moisture levels, temperature, and food supply to ensure your worms are happy and healthy.
Benefits of a DIY Worm Composting Bin
A DIY worm composting bin is an eco-friendly way to manage organic waste. By reducing the amount of waste sent to landfills, you're helping to lower greenhouse gas emissions. Plus, you're creating a nutrient-rich fertilizer that promotes sustainable gardening.
For more information on the benefits of composting, check out the EPA's guide on composting at home.
Conclusion
Creating a DIY worm composting bin is a rewarding project that turns organic waste into a valuable resource. With just a few simple steps, you can start your journey into vermicomposting and sustainable gardening. Happy worm farming!
FAQs
1. How long does it take to produce vermicompost?
It typically takes about 3-4 months to produce finished vermicompost. However, this can vary depending on the number of worms and the amount of food scraps you add.
2. Can I use earthworms for vermicomposting?
Earthworms are not suitable for vermicomposting. Red wiggler worms (Eisenia fetida) are the most commonly used worms for composting, as they thrive in decomposing organic matter.
3. What should I do if my worms are not eating the food scraps?
If your worms are not eating the food scraps, it could be due to several reasons, such as overfeeding, incorrect moisture levels, or unsuitable food. Make sure to monitor the conditions in the bin and adjust as needed.
4. Can I add worms from my garden to my compost bin?
It's not recommended to add worms from your garden to your compost bin. Garden worms are not the same as red wiggler worms and may not survive in the composting environment.
5. How do I know if my worms are healthy?
Healthy worms are reddish-brown, active, and have a voracious appetite. If your worms are not eating or seem lethargic, it might be a sign that the conditions in the bin need to be adjusted.

0 Response to " DIY Worm Composting Bin, Easy Steps"
Post a Comment