Growing Microgreens at Home, Easy Steps
Growing Microgreens at Home: Your Ultimate Guide to Homegrown Delights
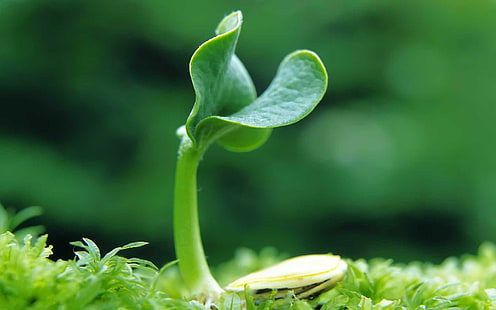
Ever wondered how to transform your kitchen counter into a thriving mini-farm? Growing microgreens at home is not only rewarding but also incredibly easy. These tiny powerhouses pack a punch of nutrients and add a burst of color and flavor to your dishes. Let's dive into the world of homegrown microgreens and explore the simple steps to cultivate your own DIY microgreens right at home.
Why Grow Microgreens at Home?
Before we get our hands dirty, let's talk about why you should consider growing microgreens at home.
- Nutrient-packed: Microgreens are like tiny superheroes, packed with up to 40 times more nutrients than their mature counterparts.
- Space-saving: They grow quickly and don't require much space, making them perfect for apartments and small homes.
- Cost-effective: Buying microgreens can add up. Growing your own is a cost-effective way to enjoy them year-round.
- Fun and rewarding: There's something incredibly satisfying about growing your own food.
Getting Started: What You'll Need
Before you start your microgreens cultivation, gather these essentials:
- Seeds: Choose from a variety like broccoli, kale, arugula, or radish. Specialty seed packets are available, or you can use regular seeds.
- Containers: Shallow trays or pots work best. Make sure they have drainage holes.
- Growing medium: A seed-raising mix or coconut coir works well.
- Watering can or spray bottle: For gentle watering.
- Light: Natural sunlight or grow lights.
Step-by-Step: Growing Microgreens at Home
Preparation
- Clean your containers: Ensure they're free from any dirt or residue.
- Add growing medium: Fill your containers with a thin layer (about 1-2 inches) of growing medium.
Sowing Seeds
- Sprinkle seeds: Evenly distribute seeds over the growing medium. You can plant densely as microgreens don't need much space.
- Press gently: Lightly press the seeds into the medium to ensure good contact.
- Water: Use a fine spray or watering can with a fine nozzle to gently moisten the medium. Be careful not to dislodge the seeds.
Providing the Right Environment
- Light: Place your containers in a sunny spot or under grow lights. Microgreens need at least 6 hours of light per day.
- Temperature: Maintain a consistent temperature between 65-75°F (18-24°C) for optimal growth.
- Watering: Keep the growing medium consistently moist but not waterlogged. Water from below by placing the tray in a shallow dish of water, or use a watering can with a fine nozzle.
Caring for Your Microgreens
- Thin if necessary: If your seeds are too densely sown, thin them out once they've sprouted to prevent overcrowding.
- Rotate: Turn your containers regularly to ensure even growth and prevent them from leaning towards the light.
- Harvest: Once your microgreens have developed their first set of true leaves (usually in 7-21 days), they're ready to harvest.
Harvesting Microgreens at Home
Harvesting is the fun part! Here's how to do it:
- Snip: Using scissors, cut the microgreens just above the soil line.
- Store: Place them in a sealed container in the fridge, where they'll keep for up to a week.
- Replant: After harvesting, you can often replant the container with a new crop of seeds.
Troubleshooting Common Issues
- Yellowing leaves: This could be due to overwatering or lack of light. Adjust your watering and light accordingly.
- Mold: If you notice mold, it's likely due to overwatering. Scrape it off and adjust your watering habits.
- Pests: Keep an eye out for pests like aphids or fungus gnats. Regularly inspect your plants and use organic pesticides if necessary.
Inspiration from the Experts
For more detailed information, check out this guide from Gardening Know How: Growing Microgreens.
Conclusion
Growing microgreens at home is a rewarding experience that brings fresh, nutritious greens right to your kitchen. With a little patience and the right care, you'll be enjoying homegrown microgreens in no time. So, what are you waiting for? Get started on your DIY microgreens journey today!
FAQs
-
Q: Can I grow microgreens in water? A: While some people do, growing microgreens in soil provides better nutrient support and prevents rot.
-
Q: How long do microgreens take to grow? A: Most microgreens are ready to harvest in 7-21 days.
-
Q: Can I grow microgreens in my kitchen? A: Yes, with the right light source, you can grow microgreens indoors.
-
Q: What's the best way to store microgreens? A: Store them in a sealed container in the fridge for up to a week.
-
Q: Can I grow microgreens in a greenhouse? A: Absolutely! Greenhouses provide the perfect controlled environment for growing microgreens.

0 Response to " Growing Microgreens at Home, Easy Steps"
Post a Comment