How to Build a DIY Cold Frame for Winter Gardening
Are you a passionate gardener who refuses to let the cold weather dampen your green thumb? Winter doesn't have to mean the end of your gardening season. By building a DIY cold frame, you can extend your growing season and enjoy fresh produce all year round. Imagine your cold frame as a cozy blanket for your plants, protecting them from the harsh winter elements. Let's dive into the world of cold frame construction and learn how to build your own DIY greenhouse for winter vegetable gardening.
What is a Cold Frame?
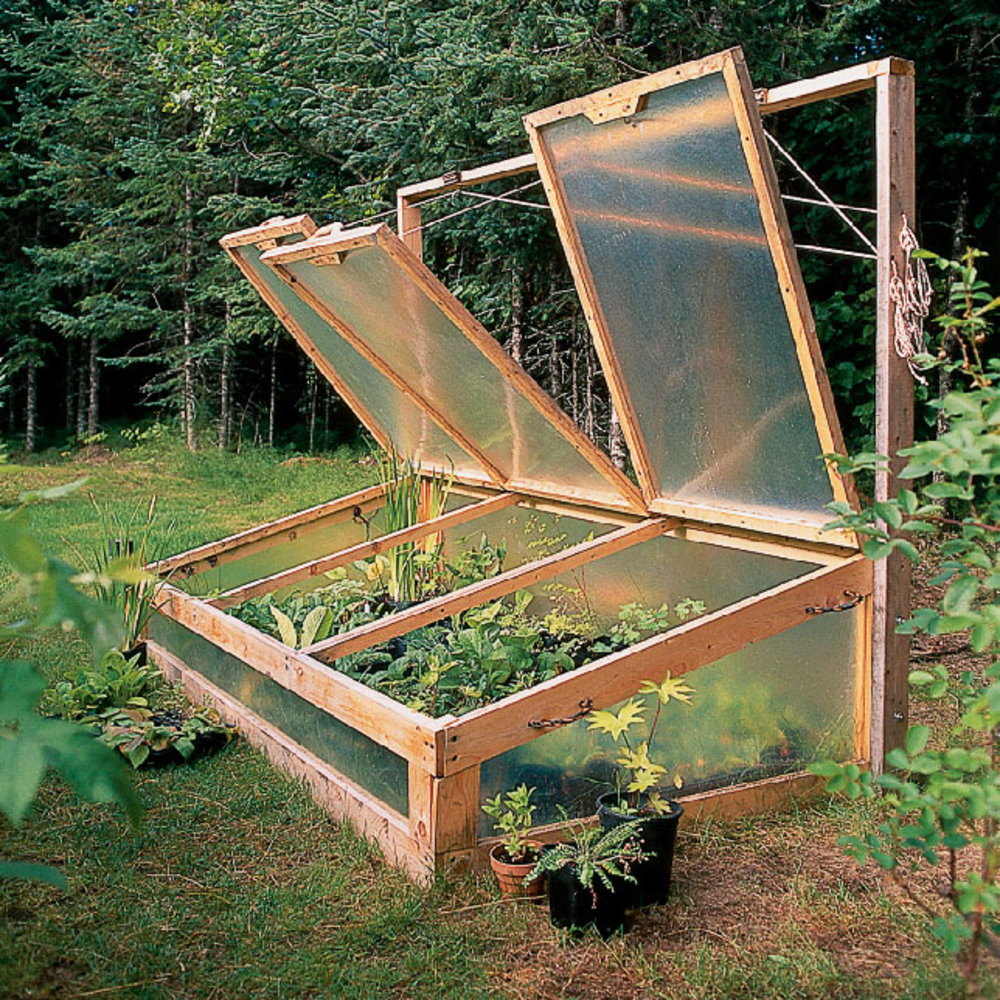
A cold frame is a simple, bottomless box with a transparent lid that acts as a miniature greenhouse. It provides a controlled environment, protecting your plants from cold weather and extending your gardening season. Think of it as a tiny, portable greenhouse that you can place anywhere in your garden.
Benefits of a DIY Cold Frame
Building your own cold frame offers numerous benefits:
- Cost-effective: DIY cold frames are much cheaper than buying a pre-made one.
- Customizable: You can tailor the size and design to fit your specific needs.
- Eco-friendly: Reusing materials reduces waste and helps the environment.
- Easy to build: With basic tools and materials, anyone can construct a cold frame.
Materials Needed for Your DIY Cold Frame
Before you start building, gather the following materials:
- Wood (untreated lumber)
- Clear plastic sheeting or old windows
- Hinges and screws
- Weatherstripping
- Measuring tape
- Saw
- Drill
- Screwdriver
- Staple gun
Step-by-Step Guide to Building Your DIY Cold Frame
Step 1: Measure and Cut the Wood
First, decide on the size of your cold frame. A common size is 3 feet by 6 feet, but you can adjust this to fit your garden. Measure and cut the wood according to your desired dimensions.
Step 2: Assemble the Frame
Using screws and a drill, assemble the frame. Make sure the corners are square and the frame is sturdy. You can use wood glue for added strength.
Step 3: Attach the Lid
Cut the clear plastic sheeting or old windows to fit the top of your frame. Attach hinges to one side of the frame and the lid, allowing the lid to open and close easily.
Step 4: Add Weatherstripping
To ensure a tight seal and better insulation, add weatherstripping around the edges of the lid. This will help keep the warmth in and the cold out.
Step 5: Install the Lid
Secure the lid to the frame with screws. Make sure it opens and closes smoothly. You can also add a handle or latch for easier access.
Step 6: Place Your Cold Frame
Choose a sunny spot in your garden for your cold frame. Make sure it's level and well-drained. Place your cold frame directly on the ground or on a raised bed.
Tips for Successful Winter Vegetable Gardening
Now that your cold frame is ready, here are some tips to maximize its effectiveness:
- Choose the right plants: Opt for cold-hardy vegetables like spinach, lettuce, kale, and radishes.
- Monitor temperature: Keep an eye on the temperature inside your cold frame. Open the lid on sunny days to prevent overheating.
- Water wisely: Water your plants sparingly, as they need less water in the winter.
- Ventilate: Proper ventilation is crucial to prevent mold and mildew. Open the lid slightly on mild days.
Additional Resources for Winter Gardening
For more information on winter gardening and cold frame construction, check out these authoritative resources:
- The Old Farmer's Almanac: Offers a wealth of information on gardening, including tips for winter vegetable gardening.
- Gardeners' World: Provides expert advice on cold weather gardening and DIY projects.
Conclusion
Building a DIY cold frame is a rewarding project that allows you to enjoy fresh produce even in the coldest months. With a little effort and some basic materials, you can create a cozy haven for your plants. So, why wait? Get started on your cold frame construction today and reap the benefits of winter vegetable gardening.
FAQs
What is the best material for a cold frame lid?
The best material for a cold frame lid is clear plastic sheeting or old windows. These materials allow sunlight to pass through while providing insulation.
How do I prevent my cold frame from overheating?
To prevent overheating, open the lid on sunny days to allow excess heat to escape. You can also install automatic vent openers that open and close based on temperature.
What are the best vegetables to grow in a cold frame?
The best vegetables to grow in a cold frame are cold-hardy varieties like spinach, lettuce, kale, radishes, and carrots. These plants thrive in cooler temperatures.
How often should I water my plants in a cold frame?
Water your plants sparingly in a cold frame, as they need less water in the winter. Check the soil moisture regularly and water only when necessary.
Can I use a cold frame for starting seeds?
Yes, a cold frame is an excellent tool for starting seeds. It provides a controlled environment that helps seeds germinate and grow into healthy seedlings.

0 Response to "How to Build a DIY Cold Frame for Winter Gardening"
Post a Comment